How to Replace a Pool Cue Tip: DIY Steps, Tools and Mistakes
The only part of the job you can permanently damage is the ferrule. Here is the careful version.
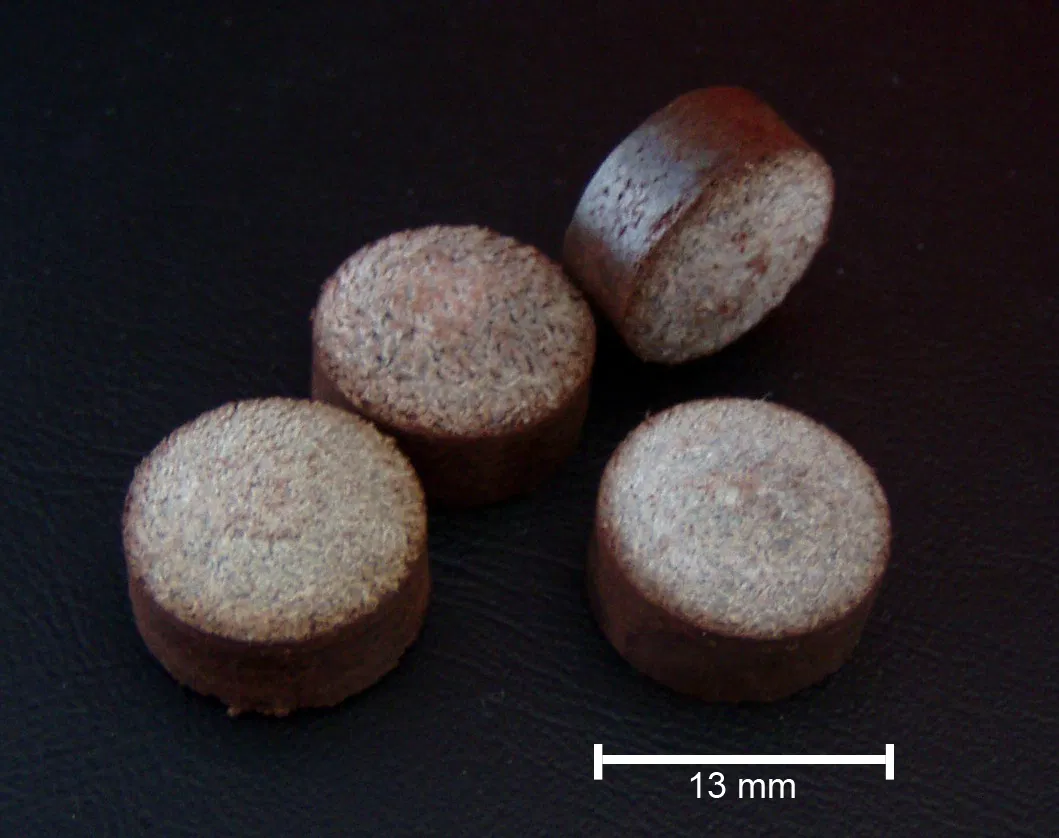
A pool cue tip is designed to be the sacrificial part — a few grams of leather that wears down, gets sliced off and replaced. The whole job is five moves: cut the old tip, face the ferrule, glue the new one, trim it flush, shape the dome. Dr. Dave Alciatore published a ten-step version that needs no special tools, and tip makers Kamui and Tiger both publish their own install procedures. None of it is exotic. What separates a clean retip from a repair bill is that the only thing you can permanently hurt in this job is not the tip — it is the ferrule underneath.
What you need on the bench
Dr. Dave's no-special-tools kit is deliberately mundane: a block of wood, printer paper, sandpaper sheets, super glue gel, a towel, Scotch tape, a utility knife and the new tip — plus, his words, lots of patience. Kamui's hand-replacement guide asks for the same family of items with tighter specs: a fresh cutter blade, a sharp knife, paper towel, a sticky instant adhesive, masking tape, a rubber board, fine sandpaper in the #1500–2000 range for finishing, and a large, hard sanding tool around #180 grit — large and hard specifically so it does not bite into the ferrule.
Two additions worth having:
- The right glue. Both tip makers specify a thick, gel-type cyanoacrylate (CA). Tiger's own tip glue is a fast-setting CA — its product page lists a 5–10 second grab and about a minute of cure, at a listed $16 for a 1 oz bottle. Kamui insists on a sticky instant adhesive for a different reason: it stays on the glue face instead of running off. Thin, watery CA is the wrong tool — it floods.
- A radius shaper for the dome at the end — the machined dime/nickel tools run about $10–15 at billiard retailers, though sandpaper does the same job slower.
A cue lathe or a dedicated tip clamp makes all of this faster and neater — it is what shops use — but neither is required. One documented alternative on Dr. Dave's page replaces the knife entirely: a portable vise gripping the shaft through a thick towel, with the excess tip sanded away instead of cut.
Step 1 — Cut the old tip off
Support the cue on a towel over the block. Position the blade close to the ferrule but deliberately leave a thin layer of tip behind — you are not trying to kiss the ferrule with the first cut. Roll the shaft back and forth and use a sawing motion; the leather comes off far easier than a straight push cut. Whatever you do, the blade never touches the ferrule itself at this stage.
Step 2 — Face the ferrule flat
This is the step that decides glue strength, per Kamui. Remove the remaining tip in thin slivers, keeping the blade as flush with the ferrule face as possible — as you get close, the knife is scraping more than cutting. On the final passes the blade can sit perpendicular to the face.
Kamui's technique for the last of it: lay the cutter blade on the ferrule and flatten the face by turning the ferrule, not the blade. Dr. Dave's version finishes the same face by lightly sanding the ferrule end with a finger centered on the sandpaper while turning the shaft — and his warning applies to every version: do not sand the outer shoulder of the ferrule. The face must end flat and clean; wipe the dust off with a paper towel.
Then tape the ferrule. Wrap masking or freezer tape around its side — it keeps glue off the ferrule and, built up to roughly the new tip's diameter, becomes a centering aid for step 4.
Step 3 — Flatten the tip's glue side
New tips arrive oversized and not always dead flat on the glue face. Kamui's prep: buff the glue side until the stamped 'GLUE' marking is gone and the face is flat — a cutter blade worked side to side, then the tip rotated 90 degrees and repeated, or sandpaper. Dr. Dave sands the back of the tip so it sits flat and absorbs glue, then test-fits it on the ferrule: oversized is correct, but it must sit flat with no wobble when you turn and slide it. Tiger's instruction is the same idea in one line: roughen the glue side with sandpaper first.
Step 4 — Glue, center, press
- A few drops, not a coat. Kamui is explicit: put a few drops in the center of the glue face — do not cover the whole surface. Adhesive spread edge to edge starts to polymerize at the surface and the bond gets weaker. Dr. Dave's equivalent: spread glue uniformly on the tip's back with a small drop in the center, so it squeezes out evenly without bubbles or voids. Tiger's version is one drop of CA on the cleaned ferrule, then rub the tip across it to spread.
- Press vertically, no sliding. Kamui warns against moving the tip side to side once the faces touch — straight down, then hold. Dr. Dave applies the pressure by pushing the shaft down onto the table.
- Wipe while it is wet. As glue squeezes out, wipe it with a paper towel while turning the shaft. That does two jobs: it cleans the ferrule, and an uneven bead is your instant off-center warning. Gel CA buys you the working time to do this — one reason the AZB forum regulars Dr. Dave quotes prefer it.
- Give it the cure, not just the grab. Tiger's spec is a set in seconds and roughly a minute of cure; Kamui says wait according to your adhesive. Either way the bond is grabbed fast — but let it sit before you start cutting and sanding against it.
Step 5 — Trim the overhang flush
Peel the tape off toward the tip. Tiger's tip for the trim: moisten the sides of the leather first — it cuts cleaner — then take the overhang off with a single-edge blade, a little at a time, with the same rolling sawing motion. Kamui does it in two passes: a rough shave with the shaft on the rubber board, then a finish pass keeping the knife edge and the ferrule flat against each other, turning the shaft and shaving from the shaft side toward the top — slipping sandpaper between knife and ferrule makes the cut run smoother.
The no-knife alternative from the AZB collective wisdom: cut strips of 320-grit sandpaper and trim the excess with a shoe-shine motion, turning the tip every fifteen seconds or so, tape protecting the ferrule the whole time. When the tape stops you short, re-wrap leaving a millimeter or two of ferrule showing and finish at 400 grit — that gap lets you flush the tip exactly without ever touching the ferrule.
Step 6 — Shape, scuff and seal
New tips are cylinders; playing tips are domes. Cut or sand the top to your radius — nickel is the common default, dime is the rounder option, and our dime vs nickel guide covers what each does to the hit.
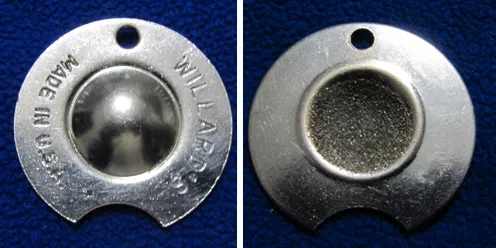
Two directional rules from Kamui matter here. Sand top to bottom only — sanding bottom to top can peel a layered tip apart. And use a wide, hard sanding tool so the ferrule stays out of it. Finish the side of the tip by burnishing: Kamui folds #1500–2000 paper around the edge, then wipes on a varnishing liquid so the sealed leather resists moisture and lasts longer; the AZB method is the simpler wet-thumb-and-paper-towel burnish, with a warning against tapered plastic burnishing tools, which have a reputation for popping tips back off. Last, scuff the fresh dome so it holds chalk, and expect a few racks of break-in before it plays like yours.
The mistakes that cost you
- Glue down the ferrule. Thin CA floods; a gel bead wiped while turning does not. Tape the ferrule before you open the bottle.
- Off-center tip. The tape wrap built to the tip's diameter is the jig — and the uneven squeeze-out bead is the alarm. Center before the glue grabs.
- Cutting into the ferrule. Leave the sliver, scrape the rest. A gouged or shortened ferrule turns a cheap retip into a ferrule job — shops charge roughly $40–50 plus the tip for that fix, per LeaguePool's repair-price survey.
- Sanding the shoulder or sides of the ferrule. Only the flat end gets touched.
- Covering the whole glue face. Kamui's chemistry warning: surface polymerization weakens the bond. Center drops, squeezed out on their own.
- Bottom-to-top sanding. The delamination move on a laminated tip.
- A wobbly blade. Another AZB poster's fix: use a fixed-blade knife so the blade cannot flex and gouge.
When a shop should do it instead
- Carbon shafts with no ferrule. Predator's rule for its ferrule-less REVO line is absolute: tip work goes to an authorized Predator Repair Center — a non-authorized tech who thins the V-TEK Tip Silencer below 0.010 inch voids the Limited Lifetime Warranty. Our carbon cue care guide covers the rest of that world.
- A cracked, loose or spinning ferrule. That is a ferrule repair wearing a tip job's clothes — see what the ferrule does.
- Laminated tips on an expensive cue. Tiger itself strongly recommends a professional cuesmith install its laminated tips.
- The honest version: you tried one, hated the result, and the cue matters to you.
The shop bill is genuinely small. LeaguePool's survey of thirteen published price lists puts a standard leather tip installed at $15–30, layered at $30–65; Seybert's published rates are $15 to install a tip bought there and $20 for one you supply.
The bottom line
Five moves, none of them difficult, all of them unforgiving of haste: cut the old tip shy of the ferrule, face the ferrule flat without touching its sides, glue with a gel CA pressed straight down, trim flush under tape, and shape top-down into the dome. Picking the leather is the other half — tip hardness changes the hit, and layered vs one-piece changes what you are gluing. If you have not checked whether the tip even needs replacing yet, start there. Browse what ships on current cues in the Cue Database.
Can I replace a pool cue tip without a lathe?
Yes. Dr. Dave's published ten-step procedure uses only a utility knife, sandpaper, tape, gel super glue, a block of wood and a towel. Tip makers Kamui and Tiger publish hand-install methods too — a lathe or tip clamp makes it neater, not possible.
What glue should I use for a cue tip?
A gel or 'sticky' cyanoacrylate (CA). Tiger's own tip glue is a fast CA listed at $16 an ounce; Kamui specifies a sticky instant adhesive so it stays on the glue face. Avoid thin, runny glue — it floods the ferrule — and do not coat the whole face, which weakens the bond.
How long does cue tip glue take to dry?
Tiger's CA spec is a 5–10 second grab and about a minute of cure; other adhesives vary, so follow the bottle. Fast to grab is not the same as ready to sand — give it the full stated cure before trimming, shaping or playing.
How do I keep the tip centered on the ferrule?
Build tape on the ferrule up to the new tip's diameter before gluing — the tape becomes a crude centering jig. Then wipe the glue squeeze-out while turning the shaft: an uneven bead means an off-center tip, while you can still move it.
Is it safe to sand the ferrule?
Only its flat end, and only lightly — the sides and shoulder should never see sandpaper. Protect them with masking tape during trimming and shaping; Kamui's guide tapes the ferrule for exactly this reason.
How much does a professional retip cost?
LeaguePool's survey of thirteen US shop price lists puts it at $15–30 installed for a standard leather tip and $30–65 for a layered tip; Seybert's published rates are $15–20 for the labor alone. A ferrule replacement with a new tip runs $40–50 and up.
Sources
- Dr. Dave Alciatore — DIY Tip Replacement (Billiards Digest, May 2021) — the ten-step no-special-tools procedure, ferrule facing, tape centering, glue pattern
- Dr. Dave — How to Replace a Cue Tip (FAQ) — AZB refinements: vise-and-sand method, 320/400-grit flush trick, burnishing warning, fixed-blade advice
- Kamui — How to replace a cue tip by hand — tool list, ferrule-turned-not-blade facing, center-drops gluing, top-to-bottom sanding rule, side varnishing
- Tiger Products — Cue Tip Glue and Tiger's Everest tip install note — CA glue spec (5–10s set, ~1min cure, $16/oz), moisten-and-trim, pro-cuesmith recommendation for laminated tips
- Predator — Carbon Fiber Shaft Cleaning — REVO authorized-repair rule and the 0.010-inch Tip Silencer minimum
- LeaguePool — Pool Cue Repair Costs and Seybert's — Pool Cue Repair — published retip and ferrule labor rates
Cover photo: Tmv23, CC BY-SA 3.0, via Wikimedia Commons. Tip shaper photo: LezFraniak, CC BY-SA 3.0.
More coverage
Keep reading
Best Pool Cues in 2026: The Complete Buying Guide by Budget
A budget-by-budget guide to 2026's best pool cues: manufacturer specs, honest price tiers, and how to match a cue to your skill level.
Mechanical Bridge Explained: Rest, Spider, Swan and the Rules
The mechanical bridge holds your cue when a shot sits beyond your reach. Rest, spider, swan and slip-on heads explained — plus the rules and what they cost.
Viking Accessories: Cue Cases, Sleeves and Joint Protection
Compare Viking cue sleeves, carrying cases and joint protectors using dated catalog prices, documented materials, and practical fit checks before buying.